This is my first Halloween card of the season. I couldn't seem to locate my Halloween stamps, so I was a little limited on my stamp choice, and ended up using a stamp set that I bought about 12 years ago. This is my submission for the Paper Pal Arts Challenge - PPA5. The challenge was for a Halloween theme. Here is the card that I came up with:
The card was made with Tangerine Tango, Basic Black, and Very Vanilla cardstock. The base of the card was made of Tangerine Tango, and was stamped with a Jumbo Background wheel with Tangerine Tango Ink. The ribbon is Tangerine Tango striped ribbon. I accented the card with three buttons/brads from the Pumpkin Pie corduroy brad set.
The image was stamped using black Stampin Pad. If you use the Stampin Pad, you need to let the image dry for an hour or so, to avoid the ink from running. If you don't have time to let the image dry, Stazon ink will work perfectly. The stamped pumpkins were colored with the aquapainter and Watercolor Wonder crayons. The aquapainter was almost dry to avoid pooling water on the image.
Monday, August 31, 2009
Saturday, August 29, 2009
Putting my idea into action
I had this great idea as I was laying in bed one night. I miss sewing, but when I sew I miss stamping and scrapbooking. So I was trying to think of a way to combine the two. I came up with an idea to make a mini scrapbook out of unconventional materials - cardboard, fabric, old dicionary paper, notebook paper, and cardstock that I altered.
I had so much fun putting this together, and I'm incredibly happy with how it came out. I was so excited about it, that I couldn't wait to see the finished product. This is only a prototype for an even bigger and better scrapbook, as I compile additional ideas, and find easier ways. Here are pictures of the scrapbook:
I used Very Vanilla cardstock on this scrapbook, but colored it with coffee. To do this, you crumple the paper a couple times, and place in a baking dish. You pour coffee (and grounds) over the paper and let the paper soak for 5-10 minutes. Drain the remaining coffee and bake at 250 degrees until the paper is completely dry. At this point, you can brush off the coffee grounds to get this desired result. I used this same technique on the dictionary pages and the notebook pages.
The flowers were made with extra fabric that I had sitting around, and were handsewn. I totally loved how these flowers came out, and now I can't stop making them :)
Friday, August 28, 2009
Catching up on Cards
I've been intending to post several cards for awhile, and I finally have time. It's an overcast day outside and about to rain. What a perfect time to spend on my laptop sharing some great cards with you all. So here you go:
Red Rose Flower:
This card was made with Ruby Red cardstock, accented with Close to Cocoa cardstock, with the image stamped on Very Vanilla cardstock. The striped paper is from a retired DSP set.
I used the large flower from the Fifth Avenue Floral stamp set. I stamped the image directly on the Ruby Red cardstock with Ruby Red Ink. I randomly placed two images of this on the background, just to break up the solid red. Inking the same color on the cardstock gives a subtle image, but does not overpower the main stamped image. To get the main flower, I stamped the flower on Very Vanilla cardstock using Ruby Red ink. I then cut the flower out, getting as close to the edges of the flower as possible. It can be tedious, but definitely worth the end result. The flower was put on the card with a stampin dimensional to make the flower standout just a little bit more.
Lots of Trees:
I love this stamp set so much, and it's such an easy set to use. This card is made with Not Quite Navy, Baja Breeze, and Whisper White cardstock. I used a retired DSP for the background.
The images are from the Trendy Trees stamp set and were stamped using Not Quite Navy ink for the trunk of the trees, and Baja Breeze ink for the bush part of the tree. I used the stamp-a-ma-jig to line up the trees. This tool is a must with this stamp set!!
I accented the card with 1/4" white grosgrain ribbon wrapped around the entire card, and 2 jumbo brads in the lower corner.
Happy Birthday!
I made this card a couple months ago, and it's still one that I really like. This card used Baja Breeze and Very Vanilla cardstock, and retired DSP. The package images are from teh stamp set Big Bold Birthday, and the 'Happy Birthday' sentiment is from the 'Voila' stamp set. All images were stamped using Not Quite Navy ink. The card was finished with an eyelet on either side of the card.
Red Rose Flower:
This card was made with Ruby Red cardstock, accented with Close to Cocoa cardstock, with the image stamped on Very Vanilla cardstock. The striped paper is from a retired DSP set.
I used the large flower from the Fifth Avenue Floral stamp set. I stamped the image directly on the Ruby Red cardstock with Ruby Red Ink. I randomly placed two images of this on the background, just to break up the solid red. Inking the same color on the cardstock gives a subtle image, but does not overpower the main stamped image. To get the main flower, I stamped the flower on Very Vanilla cardstock using Ruby Red ink. I then cut the flower out, getting as close to the edges of the flower as possible. It can be tedious, but definitely worth the end result. The flower was put on the card with a stampin dimensional to make the flower standout just a little bit more.
Lots of Trees:
I love this stamp set so much, and it's such an easy set to use. This card is made with Not Quite Navy, Baja Breeze, and Whisper White cardstock. I used a retired DSP for the background.
The images are from the Trendy Trees stamp set and were stamped using Not Quite Navy ink for the trunk of the trees, and Baja Breeze ink for the bush part of the tree. I used the stamp-a-ma-jig to line up the trees. This tool is a must with this stamp set!!
I accented the card with 1/4" white grosgrain ribbon wrapped around the entire card, and 2 jumbo brads in the lower corner.
Happy Birthday!
I made this card a couple months ago, and it's still one that I really like. This card used Baja Breeze and Very Vanilla cardstock, and retired DSP. The package images are from teh stamp set Big Bold Birthday, and the 'Happy Birthday' sentiment is from the 'Voila' stamp set. All images were stamped using Not Quite Navy ink. The card was finished with an eyelet on either side of the card.
Tuesday, August 25, 2009
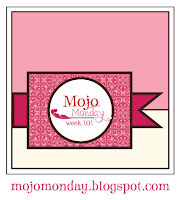
Mojo Monday Week 101
Back to stamping in full force again after dabbling in a bit of scrapbooking this past week. I'll post pictures of this later in the week. I'm so proud of my creation, and it's a springboard and experiment for an even better creation in the near future once I have purchased all of my supplies. Isn't that always the way - I have an idea but I have to buy mores supplies...I'm a hoarder and a lover of all things stamp related, I admit it.
Here is the challenge sketch for this weeks Mojo Monday challenge:
Here is my interpretation of it:
I got this stamp set when it was retiring in July with every intention to use it on my own wedding invitations. I got the stamp and realized it didn't really fit with my plans for a wedding invite. I bought the stamp so now I have to use it. When I saw this sketch, the stamp set popped out at me, and the elegant look of the DSP that I had made it look even better.
I used Bella Bleu DSP, with coordinating Brocade Blue and Very Vanilla cardstock. I accented the card with 5/8" inch Brocade Blue grosgrain ribbon topped with 1/4" Very Vanilla grosgrain ribbon.
The stamped image is from the 'To Have & To Hold' Stamp set. I stamped the image on cardstock, and then cut the portion of the image that I wanted with the scallop punch. The image was too plain as is, so I used the Watercolor Wonder Crayons in Bashful Blue and my Aquapainter to subtly color in the flowers in the bouquet and the hair piece. I also painted lightly along the outline of her dress and his suit. I did not use the coordinating Brocade Blue because I wanted a lighter more subtle effect. When doing this, make sure that you Aquapainter brush is not full of water - the brush should be almost dry or you will get a blob of color on your flowers.
Finally, for the inside of the card, I used the same stamp set to stamp a frame on Very Vanilla cardstock and used my Stamp-a-ma-jig to center the sentiment in the middle of the frame. I was hesitant to buy the Stamp-a-ma-jig at first - just another thing to have lying around on my craft table, but it has become a staple for me and saved me from many frustrating moments when I can't get my sentiment straight.
Sunday, August 23, 2009
Final Mojo Monday Turns 100 Sketches
A little behind on the sketches for the week, but I just had to do the Friday and Saturday sketches.
Here is Fridays sketch:
Here is my take on the sketch.
This is sort of red, white, and blueish I admit. I've had this DSP for the past year, and I've liked it so well that I've hardly used it. Why buy it if I'm not going to use it, right? And...I can't buy more paper until I use what I already have. So enough procrastination on the paper usage. I made one other card with this paper today as well.
The circles were new for me today - this is a sketch that I haven't done anything remotely close to in the past.
This card used Ruby Red and Not Quite Navy paper, and retired DSP. The inked images were from the 'Trendy Trees' stamp set, and were stamped using the Stamp-a-ma-jig. What a great invention - it takes so little work now to line up the images for two steps stamping. I used the same paper colors for my ink. I topped this off with some beautiful white ribbon that I had in my stash.
And here is Saturdays sketch:
and my idea of this card:
I personally love this card. I'm so happy with how it came out, and only wish that this as well was not retired DSP - I'd like to make these as my holiday cards. I'll have to work out an alternate version of this card for my yearly cards.
This card used retired cardstock and DSP - Baja Breeze and Riding Hood Red cardstock. I also used Red Riding Hood ribbon. The scallop's were cut using the scallop edge cutter. I used eyelets on the stamped image for a little something extra.
The stamp set I used is the same as a card earlier this week - 'It's Snow Time'. I used one of my new favorite techniques - watercoloring with the aquapainter and crayons. It creates such a nice look on the snowmen - better than a stark white, and just a hint of grayish blue. It's overall a light look that is not as stark as using cardstock.
Thursday, August 20, 2009
Mojo Monday turns 100 - Day 4
Here is Thursdays Mojo Monday turns 100 challenge:
And here is my version of the sketch:
Today was all about layers for me. I'm also going through a stage where I want to use stitching on my cards. I used all retired Stampin' Up product on this card. A little early for holiday cards, but it's never too early to start on holiday cards!!
I used Dashing DSP, and coordinated with Real Red, Ruby Red, Old Olive, and Certainly Celery cardstock. I used my sewing machine to create the zig zag stitches seen in the background.
The santa image is from the 'Its Snow Time' stamp set. I stamped the image and cut it out using the Scallop Circle punch. To color the santa, I grabbed color from the Ruby Red wonder crayon using the aqua painter and painted the red, just like using water color paint. To color in the 'ho ho ho ho', I used a black stampin marker.
I topped the card off with certainly celery ribbon, and a red button from the retired button bouquet set. Glue dots worked perfectly to adhere these two things to the card.
Wednesday, August 19, 2009
Mojo Monday turns 100 - Day 3
Here is the template challenge for Wednesday (day 3) of Mojo Monday turns 100:
Here is my take on the card template:
I'm doing a monthly technique challenge, and I loved the technique so much, that I couldn't wait to do it again. I love the Kindred Spirits stamp set, but I'm always trying to think of a different way to use this stamp. I really like how this card came out - muted colors again, but I just can't seem to bring myself to use bright colors lately.
I used Not Quite Navy, Brocade Blue, and Very Vanilla cardstock, and Bella Bleu DSP. The scallop edge punch was used on the left side, and the 'Thinking of you' sentiment was cut with the curly label punch.
The stamped branch image is from the Kindred Spirits stamp set (retired), stamped with Not Quite Navy ink. To create the raised circle image:
-inked the stamp first on Versamark, and then on the Stampin' Pad.
-immediately stamp the image on cardstock
-sprinkle Glassy Glaze Enamel Stampin' Emboss Powder (Clear Emboss Powder will also work) over the image and make sure it is thoroughly coated
-use the heat tool to melt the Emboss powder
-use a circle punch to cut out the image, and line up the image on the larger image to match them up
I used the same raised image technique for the 'Thinking of you' sentiment.
The aged look on the stamped image was achieved by using a sponge dauber inked with Not Quite Navy.
The buttons were from retired designer buttons in a light blue.
Tuesday, August 18, 2009
Mojo Monday Turns 100 - Day 1
Here is my submission for day 1 of celebrating 100 for Mojo Monday. This is the design template that was used:
Based on this sketch, I made the following card:
The original image had a large scallop circle under the stamped image. Since I don't have a large scallop circle cutter, I had to improvise a bit. I had seen an image where the chef in the Voila stamp set was cut off at the middle, and I liked the different look that it gave, so I thought I would give it a try here.
The base of the card is Sahara Sand cardstock, accented by Brocade Blue cardstock. The images were stamped on Very Vanilla cardstock. The printed paper is Bella Bleu DSP.
To create the circle image behind the chef, I used the scallop punch, and cut 6 scallop circles and positioned them to create a circle.
The stamped images come from the Voila stamp set. I stamped the chef onto a piece of cardstock, then positioned the cake stamp using the Stamp a ma jig to center the cake on the platter. I cut out the portion of the chef image that I wanted for my card and used Brocade Blue, Not Quite Navy, and Gray markers to color in the chef and create some shading. Silver brads were used on the chef jacket in place of the black dots on the stamped image. The corners of the cardstock were rounded using the corner rounder, with one corner left square.
The Happy Birthday was stamped using Brocade Blue and adhered to a piece of cardstock cut using the Scallop punch. Holes were cut in the stamped image using the crop-a-dile, and jute twine was run through the holes and wrapped around the card.
Monday, August 17, 2009
Splitcoast Challenge 241
Splitcoast Stampers challenge 241 provided the following template to stampers to make their version of the card. Here is the template:
and here is the card that I created based on this template:
I immediately gravitated to this stamp set, as this layout allows me to showcase the stamp from and center. The layout also allows me to use DSP, but not cover it up with the additional layters on the card. The card ended up being simple, but earthly colors - my favorite kind of card.
The base for the card was Sahara Sand Cardstock, and the background DSP was Chocolate Chip. I used a couple of the prints from the 'To The Nines' specialty DSP. I chose the Always Artichoke based DSP prints to best match with the stamped image.
The stamped image is from the Font of You stamp set (currently on the dormant list), and I used Chocolate Chip for the vase, and Always Artichoke for the flowers. The paper edges of the image are distressed and then inked with Always Artichoke ink. You can use the Stampin' Up! distressing tool, or your fingernail by running it along the edge of each side of the paper. I topped the card off with eyelets in all 4 corners and Chocolate Chip grosgrain ribbon.
Sunday, August 16, 2009
Week 99 MojoMonday Challenge
I was searching the web today for some inspiration to get me started with stamping again, and I found this fabulous weekly challenge. This is exactly what I needed to get me going - I went ahead and made 7 other cards while I was at it. This got my juices flowing.
I've been trying to use some of my retired Stampin'Up! DSP, and I think this was from about a year ago. I loved it so much when I bought it that I didn't want to use it, and I wanted to save it. Now I'm left with almost a whole package of it. Time to use it up.
The stamp used is from the Trendy Trees stamp set, and was stamped with Always Artichoke and Certainly Celery ink. I accented with Always Artichoke and Certainly Celery cardstock. The hardware was from the Stampin'Up! Hodgepodge Hardware set. The flower brad was distressed a bit by running it along the Always Artichoke stampin' pad. I like how it breaks up the heavy brad on the card and does not seem so overpowering when I stamp a smaller image. The ribbon is Certainly Celery.
Subscribe to:
Posts (Atom)
Welcome to my site!!
I recently moved to Arizona a couple months ago, and am very happily settling into a new career. I was introduced to stamping over 10 years ago. I've always been into crafts, and picked back up with stamping a couple years ago. I love that I finally have the time to dedicate to my crafts, and that I'm able to share my ideas with everyone. I've seen myself grow in my creativity over the past couple years, and to those who say that they are not creative - don't believe it. Anyone can do this, and creativity doesn't happen overnight, it evolves as you learn more and more about the art of stamping. My husband is incredibly supportive as I put more time into my stamp designs and my scrapbooking.